Dataviews
Customizing the Columns
The columns in a Dataview can be customized in a number of ways,
- Columns can be moved
- Columns can be hidden
- Column Display Text can be changed
- The alignment can be changed
- The format of the data can be changed
To modify the columns right click on the dataview to display the dataview context menu and select columns ( or choose columns from the menu bar ). A dialog will be displayed showing a list of all the available columns and their settings.
Use the up and down arrow keys on the menu to change the order the columns are displayed.
To Hide a field click on the Hidden field for the column to hide.
To Change the Display text for a field click over the text in the Column Display Text field.
Use the Alignment Column to select the alignment for that column.
The Format field is used to the control how the column displays its data for example.
N0 defines a number field with no decimal points.
N2 defines a number field with 2 decimal points.
G defines a date field and shows just the date.
g defines a date field and shows the date and time
These are standard dotnet formats. If you want to have the data displayed in a different way let us know and we will help you format the data the way you want to see it.
Displaying Line Numbers
This will display Line Numbers as shown below
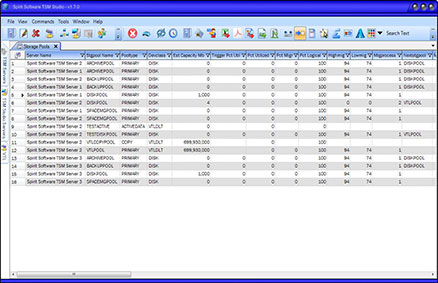
Sometimes it is handy to be able to the see line numbers in a dataview.
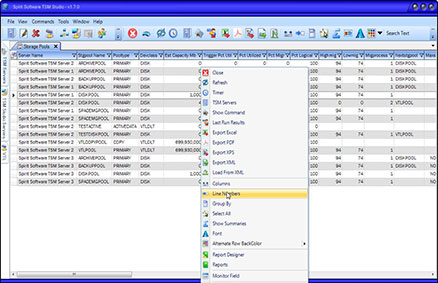
Right click on the Dataview and select the Line Numbers option from the Dataview context menu ( or from the Main Menu Bar ) to disable/ enable line numbers.
To Enable Line Numbers click on the Line Numbers option from the Dataview Context Menu.
Exporting the Data

From time to time you may wish to export the data from a dataview. TSM Studio provides a number of formats that you can use to export to Excel, PDF, XPS and XML. .
Right click on the Dataview to display the context menu for that Dataview and select from the available Export Options, then choose the ourput file name.
Data exported to XML can be reloaded later using the Load from XML option on the Dataview context menu, this allows you to work offline if you wish.
Filtering the Data
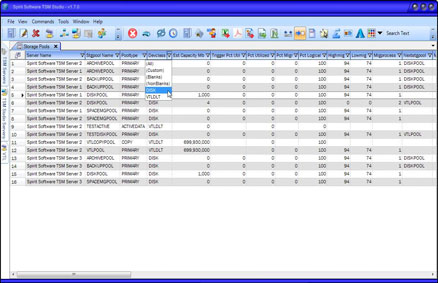
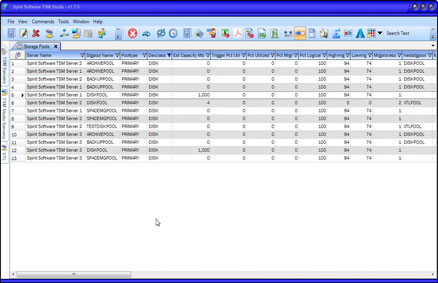
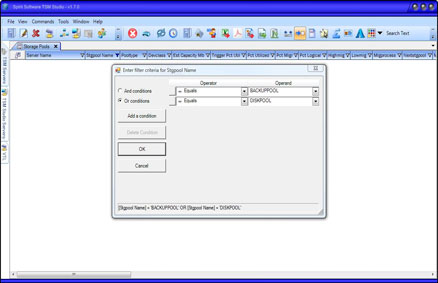
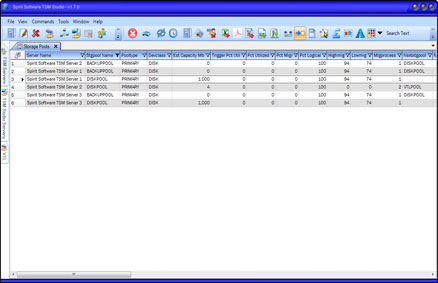
TSM Studio provides extremely powerful filtering capabilities.
At the top of each column on the right hand side where the title is displayed you will also notice a small filter icon. Click on this icon to display the filtering dialog for that column. The icon is only displayed when the mouse is positioned in the column header.
Filtering Examples
Show all rows where Devclass = ‘DISK’
Show all Rows where Stgpool Name is either DISKPOOL or BACKUPPOOL.
Get Column Totals ( Summary Feature )
Sometimes it is useful to be able to total, sum or average a column.
Right click on the Dataview to display the context menu and select Show Summaries.
Grouping the Data
It can be useful to group the displayed data. Grouping can be done on a single column or multiple columns.
To enable grouping Right Click on the dataview to bring up the dataview context menu and select the Group By option. This will create a small header area at the top of the dataview.
Drag the column to which you want to group by into this header.
Realtime Monitoring
Select the Monitor Field option from the dataview context menu.
Then choose the field to monitor and select Ok
The Monitor Parameter dialog will now be displayed.
A Number of the Dataviews ( such as the Storage Pool and Database Dataviews) have an extra option in their context menu – Monitor Field.
This option allows you to choose one of the numeric fields in the dataview and watch it change over time.
- To access the realtime monitor right click on the dataview to bring up the dataview context menu.
- Select the object you wish to monitor
- Select the Monitor Field option from the Menu
- Select the field you wish to monitor
What Dataviews are available

See the Dataviews and Commands PDF found here https://spiritsoftware.biz/tsm-studio-documentation/
Using the Timer

The Timer option is used to auto refresh any dataview. This can be useful when watching the running processes or attached sessions.
Right Click on the Dataview to bring up the Dataview content menu, select Timer
Enable the timer and select the interval to have the dataview auto refresh


